
You can turn an Adobe Illustrator (.ai) garment mockup into an editable tech pack with AI Tech Packs. The artwork, placement, color references and dimensions in your file give us details to build from. Here’s how to prepare your mockup, upload it, and review the resulting tech pack.
When you’re placing a logo on a garment, it helps to work with the size you actually want made. An 8 cm logo should be 8 cm wide in Illustrator. If its top edge sits 6 cm below the neckline, draw that distance as 6 cm too.
This is working at actual size, or 1:1. It gives you a clear reference for checking artwork size and placement before you bring the design into AI Tech Packs to create your tech pack. You can zoom out to see the whole garment and zoom in to work on the graphic without changing either measurement.
Start with one measurement you know
You don’t need a complete size chart to get started. AI Tech Packs can estimate missing production measurements from your design. Giving it one known measurement, such as flat chest width, provides a real-world reference for estimating other dimensions from the mockup’s proportions.
For example, if your size M garment should measure 60 cm across the chest when laid flat, label it “Size M · Flat chest width: 60 cm” and mark the two measuring points. This is the width across the garment, not the full chest circumference.
Use that measurement to set up your flat front and back views at actual size. Resize each view proportionally until the distance between the chest-width points is 60 cm in Illustrator. Check the marked distance directly: the width of the entire selected jacket may include the sleeves.
That known width gives AI Tech Packs a scale reference for estimating other visible measurements, such as body length or shoulder width. Keep the drawing true to the proportions you intend, and include any other measurements you already know. More accurate references help produce better estimates.
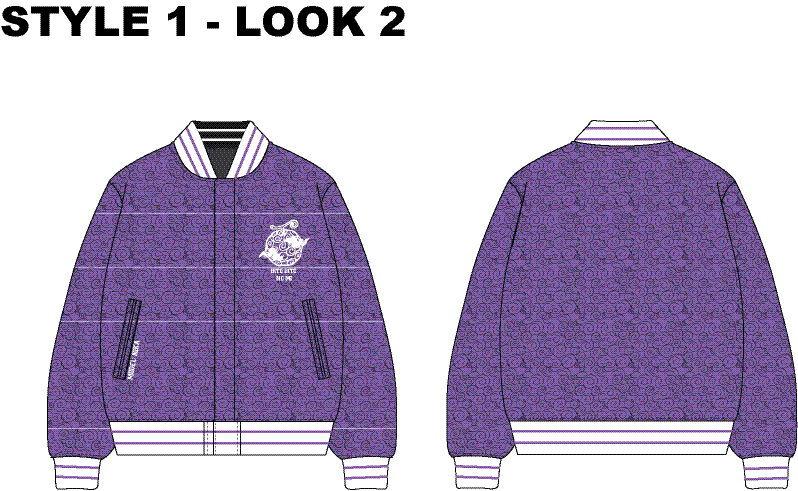
Set up your units and artboard
Use centimeters or inches, whichever you use in your production specifications. Set the document units through File → Document Setup, and use rulers and guides to help position the drawing. Adobe’s guide to ruler and unit settings explains the controls.
Make the artboard large enough for the actual-size garment, both views, and your notes. Leave space around the drawing so labels and measurement lines are easy to follow.
A full-size garment will take up more space than a small presentation sketch. Use Illustrator’s zoom controls to fit it on screen. Avoid shrinking the drawing just to make it easier to view: that changes the measurements you’ve set.
Give the artwork its intended dimensions
Select the logo or graphic and open Window → Transform. Enter its intended width in the W field and keep the proportions locked to avoid stretching the artwork. Check the resulting height in H. Adobe’s Transform panel guide shows these controls.
For example, a graphic designed to be 8 cm wide and 4 cm high should read 8 cm × 4 cm in Illustrator. If setting the width to 8 cm produces a different height, check the original artwork proportions before changing both fields independently.
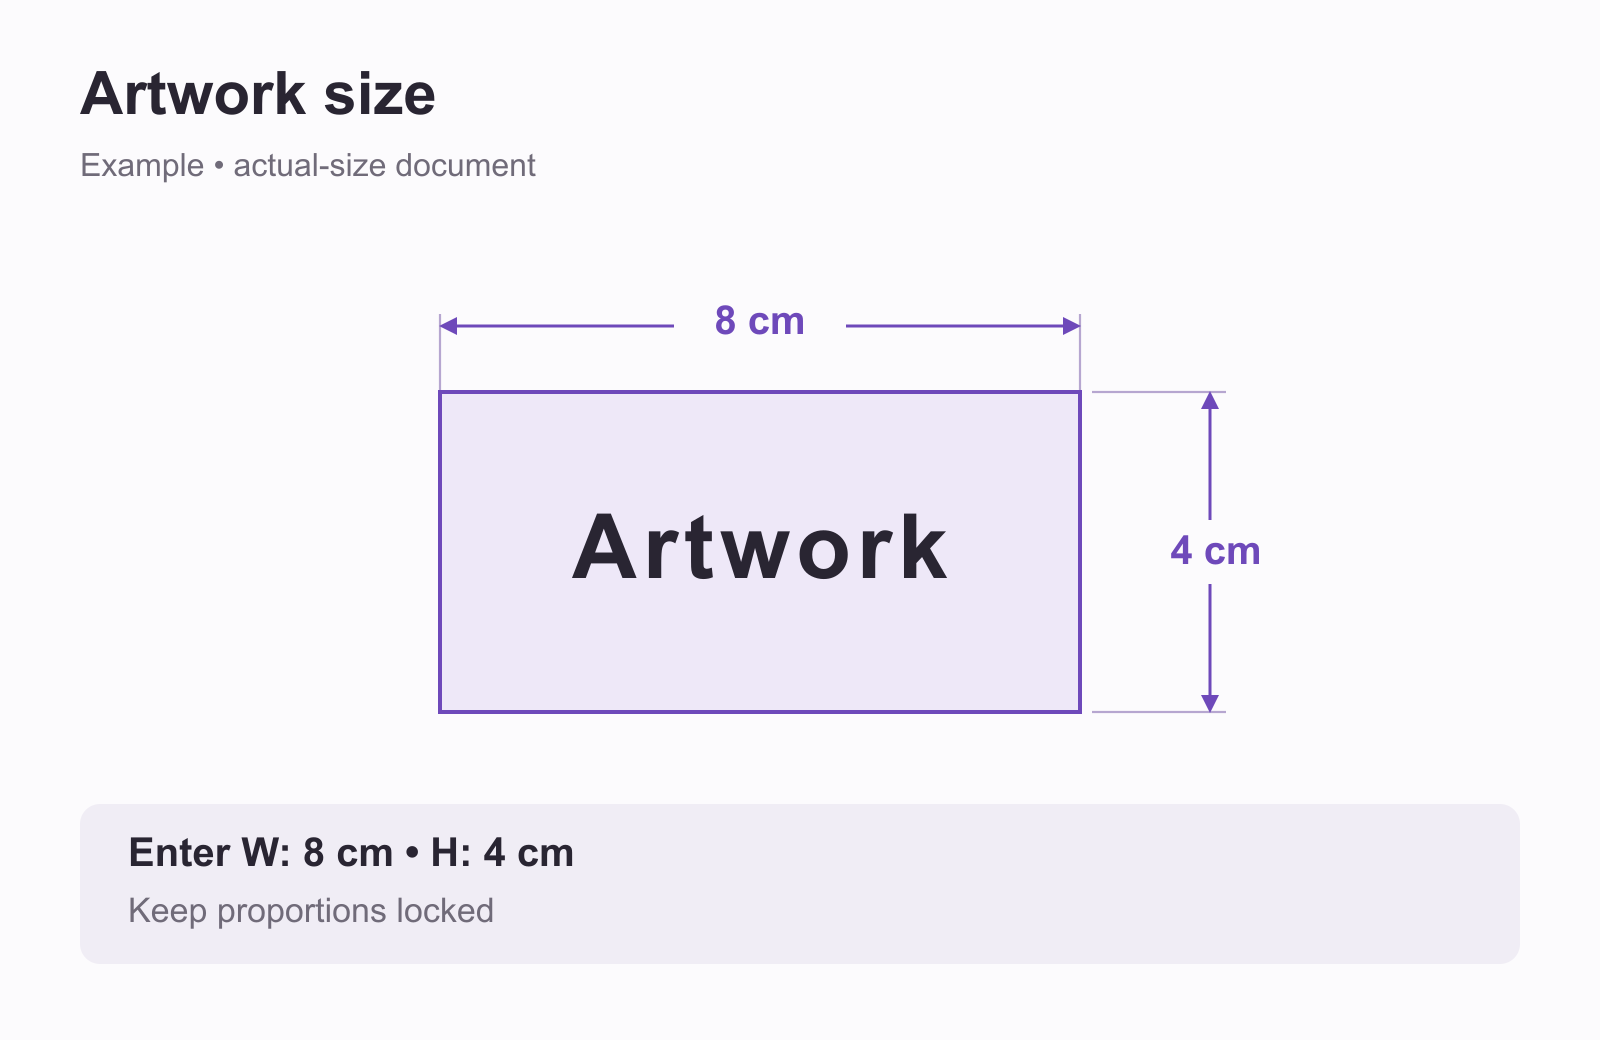
Select only the artwork you intend to print or embroider. A stray object, invisible rectangle, or nearby note can affect the selected dimensions. Keeping the graphic organized makes this check easier.
Keep a copy of the original artwork alongside the applied version or in a clearly named source file. That gives your print or embroidery team the artwork to work from as well as the garment view showing where it belongs.
Measure placement from a clear garment point
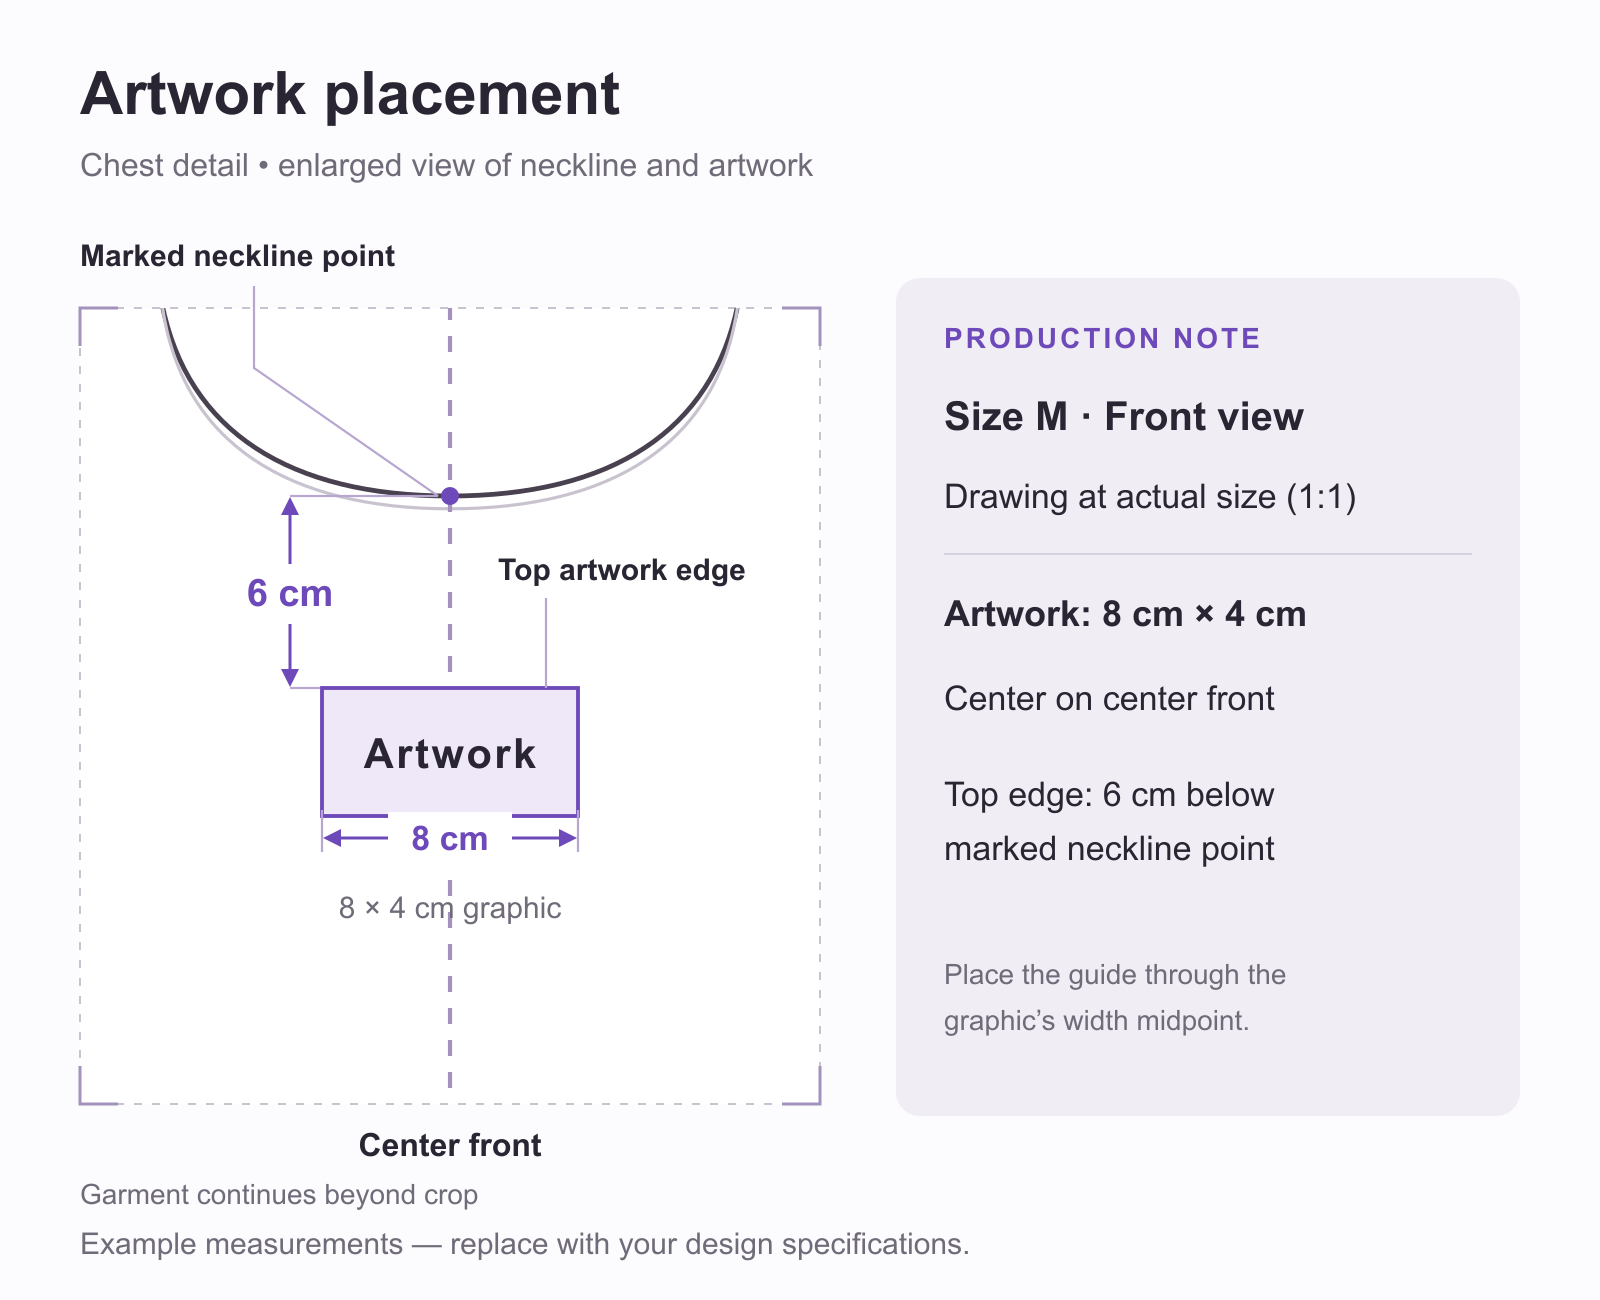
Choose a specific starting point for each placement measurement. For a center-front chest graphic, you might measure from the center-front neckline point to the graphic’s top edge.
Mark that neckline point, draw the 6 cm placement distance, and position the graphic accordingly. Add a center-front guide and align the graphic to it. A vertical distance alone doesn’t explain the horizontal placement.
Use arrows or measurement lines that clearly show where each distance begins and ends. “6 cm below neckline” leaves room for interpretation; a marked point and a named graphic edge make the instruction easier to follow.
Add the production notes
Even when the drawing is at actual size, write down the artwork dimensions and placement. Someone reviewing a printout or screenshot should be able to understand the design without measuring it themselves.
Here’s a note you can adapt for your mockup. Use your own garment’s measurements; the numbers below are just an example:
Size M · Front view · Drawing at actual size (1:1). Measurements in cm. Graphic: 8 cm wide × 4 cm high. Center graphic on center front. Top edge: 6 cm below the marked center-front neckline point.
Add the color reference you want used, including the color system and range where relevant. Keep the text readable and close enough to the artwork that its meaning is clear.
Bring the mockup into your tech pack
Open the AI Tech Packs generator and choose Illustrator file under Your design. Upload your .ai file, review any garment views found in it, and use the ones you want as references. You can upload your own reference images too.
Set your size range, sample size and measurement units, then generate your tech pack.
Readable artwork objects in an Illustrator file carry width, height, and position information. AI Tech Packs can use that information, source artwork references, and written specifications when you generate a tech pack.
The measurements you provide guide the tech pack, while AI Tech Packs estimates those that are missing. Include your known chest width or another clear reference measurement, along with the size and units. Working at actual size keeps the garment, artwork and placement distances on the same scale.
After importing, review the estimated measurements alongside your known dimensions. Check the artwork, placement and color references too, then confirm the specifications before sending the pack for sampling.
For revisions to an existing pack, follow the Illustrator editing guide. For the size chart, construction details, and other information accompanying your mockup, see the complete guide to clothing tech packs.
Do I need a drawing for every size?
Start with a clearly named reference size. If you already have a size chart or grading rules, include them and explain whether artwork size or placement changes across sizes. Review the generated size chart before sampling so the factory has measurements for the full range.
When the drawing, artwork, and production notes agree, upload your Illustrator file to AI Tech Packs to start your tech pack.